Diagnosing Your Refrigerator: A Guide to Refrigerator making clicking noise and not cooling
It can be alarming when your refrigerator, the silent workhorse of the kitchen, suddenly starts making a clicking noise and stops keeping your food cold. Many people immediately fear the worst: a dead compressor, which would mean a costly repair or a new appliance. However, this is the most common and costly myth Refrigerator making clicking noise and not cooling this issue. The clicking sound is often a key clue, signaling that a much simpler, less expensive component is either trying and failing to start or has become faulty.
This report will debunk common misconceptions, walk you through the most frequent culprits, and explain how to definitively differentiate between a simple fix like a start relay and a serious issue like a failed compressor. We will also cover preventative measures and provide a detailed cost analysis for repairs to help you make an informed decision.
Safety First: The Unplug Rule
Before you begin any inspection or troubleshooting, the most critical first step is to unplug your refrigerator from the power outlet. This is essential to protect you from electrical shock as you investigate the components, which are often located at the back or bottom of the appliance. You may need to pull the refrigerator away from the wall to access the rear panel.
Part 1: Pinpointing the Problem’s Location
Your first diagnostic step is to listen carefully and determine where the clicking sound is coming from. This will narrow down the potential causes significantly.
- Clicking from the lower back: This sound, often repeating every 3-5 minutes, typically points to an issue with the compressor or its related components failing to start. This is almost always associated with a cooling failure.
- Clicking from inside the freezer: This may indicate a problem with the ice maker cycling or frost buildup interfering with a fan. An ice maker issue is usually separate from the refrigerator’s ability to cool.
- Clicking from the control panel area: This could be a failing mechanical defrost timer or a faulty relay on the main electronic control board.
Part 2: The “Hum-Then-Click” Cycle: Compressor Start-Up Failures
If the click is coming from the lower back, you are likely hearing the “hum-then-click” cycle, which indicates the compressor is failing to start. It’s a mistake to assume this means the compressor itself is dead.
Understanding the Cycle
When the thermostat calls for cooling, it sends power to the compressor system.
- The Hum:The start relay gives the compressor a jolt of power to get it started. The hum is the sound of the compressor motor drawing electricity but failing to turn over.
- The Click:Because it can’t start, the motor draws excessive current, causing it to overheat. A safety device called the overload protector detects this heat and cuts power, creating a distinct “click”.
- The Repeat:After a few minutes, the overload protector cools down and resets, and the cycle repeats every 3 to 5 minutes.
Distinguishing a Faulty Relay from a Failing Compressor
The key is to determine if the problem is the inexpensive start relay or the very expensive compressor itself. Focusing only on the compressor can cause you to overlook the actual, simpler problem.
| Symptom | Likely Cause: Faulty Start Relay / Overload | Likely Cause: Failing or Seized Compressor |
| Audible Cues | A distinct hum for a few seconds followed by a sharp click, repeating every few minutes. | The hum may be louder, or you might hear loud banging, clanking, or grinding noises, indicating serious internal mechanical failure. |
| Component Temperature | The start relay and overload protector may be hot to the touch. The compressor itself will be very hot from repeated failed start attempts. | The compressor housing will be extremely hot, much hotter than its normal warm operating temperature. |
| Vibration | You will feel little to no vibration from the compressor itself during the hum. | You might feel a significant jolt or intense vibration when the compressor tries to start. |
| Physical Signs | The relay may have burn marks, a burnt smell, or rattle when shaken. Small, burnt particles may even fall out. | The primary signs are extreme heat and loud mechanical noises from the compressor unit. |
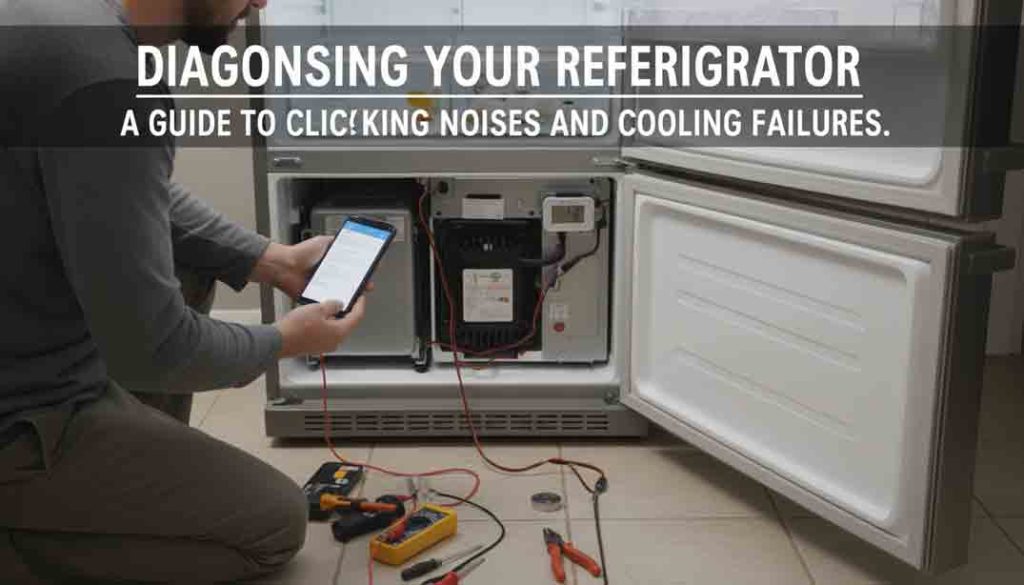
Part 3: Step-by-Step Diagnostic Testing
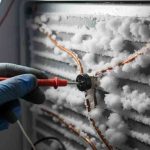
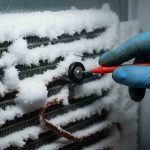
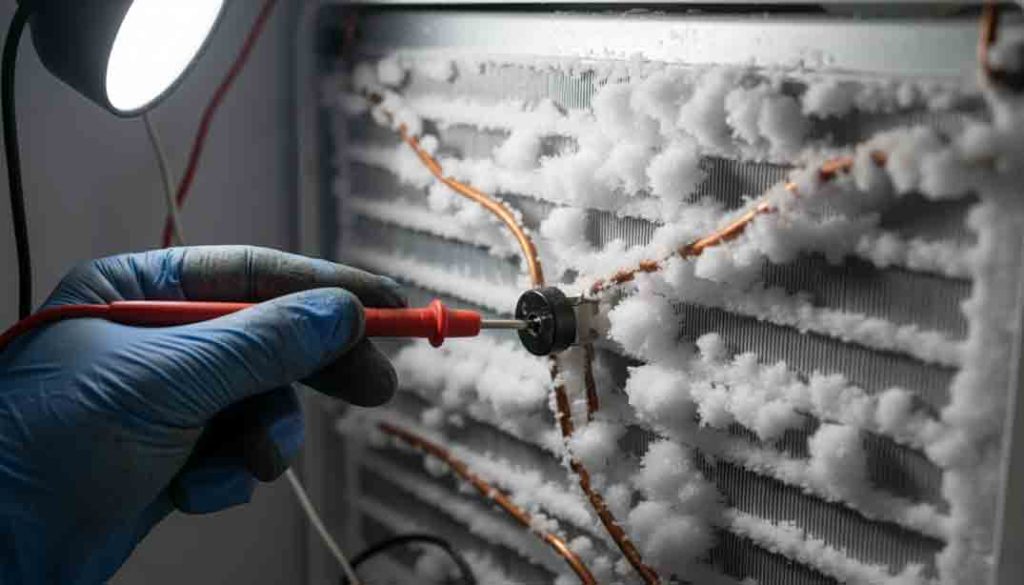
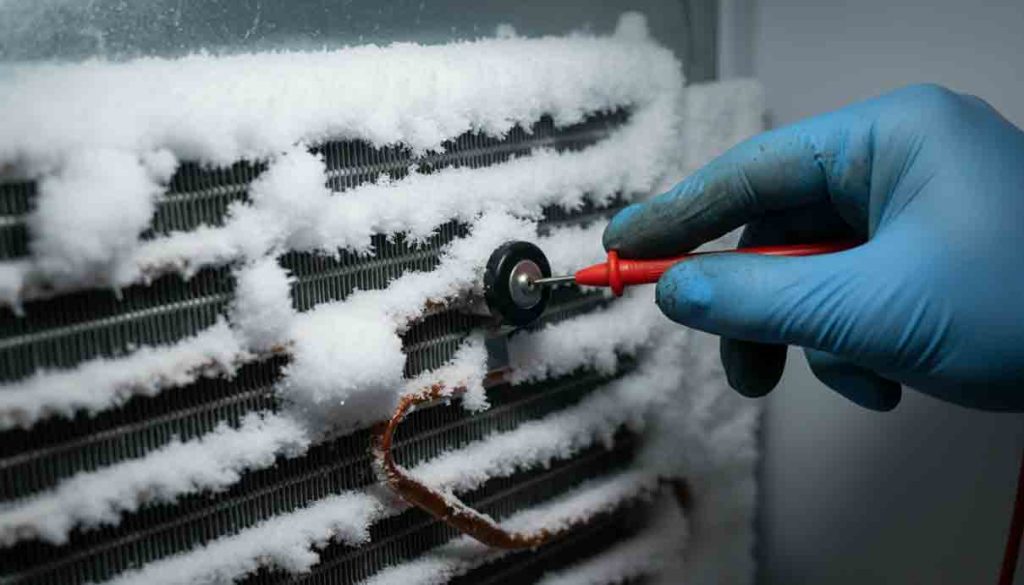
After unplugging the fridge, you can perform tests to pinpoint the failed part. The start relay and overload protector are small components attached to the side of the black, dome-shaped compressor. It’s a good idea to take a picture of the wiring before disconnecting anything to ensure proper reassembly.
Simple Tests (No Tools Required)
- Visual Inspection:Look for burn marks, melted plastic, or a strong acrid smell from the relay or overload protector. Any of these signs warrant a replacement.
- The Shake Test:Carefully pull the start relay off the compressor. If you shake it and hear a rattling sound, its internal components are broken, and it is almost certainly faulty and needs to be replaced. A good relay should not make any noise.
Advanced Diagnostics with a Multimeter
For a definitive diagnosis, use a multimeter set to the resistance (Ω) or continuity setting.
- Testing the Overload Protector
- Touch one probe to each terminal or one to the wire terminal and the other inside the pinhole that connects to the compressor.
- Good Part: It should show continuity with a resistance reading between 0 and 1 ohm.
- Bad Part: A reading of infinity or “OL” (open line) means it is faulty and must be replaced.
- Testing the Start Relay (PTC Type)
- Most modern refrigerators use a PTC (Positive Temperature Coefficient) relay. Test the resistance between the two pinholes where it connects to the compressor.
- Good Part: At room temperature, you should get a reading between 3 and 12 ohms.
- Bad Part: A reading of “OL” or one far outside this range means the relay has failed.
- Testing the Compressor
If the relay and overload test good, the compressor itself may be the problem. It has three pins: Start (S), Run (R), and Common (C).
- Test Windings for Resistance: Measure the resistance between all three pairs of pins (S to R, S to C, and R to C).
- Good Compressor: You should get three distinct readings. The reading from S-to-C plus the reading from R-to-C must equal the reading from S-to-R (e.g., 6Ω + 4Ω = 10Ω).
- Bad Compressor: If any reading is “OL,” a winding is broken. If the numbers don’t add up correctly, the windings are faulty.
- Test for a Short to Ground: Touch one probe to a compressor pin and the other to a bare metal part of the compressor casing. Repeat for all three pins.
- Good Compressor: The multimeter should read “OL,” showing no continuity.
- Bad Compressor: If you get any resistance reading, the compressor is shorted and dangerously unsafe. It must be replaced.
Part 4: Other Common Culprits & Simple Checks
Before assuming the issue is with the compressor system, check these other potential causes.
- Dirty Condenser Coils
Clogged coils can’t release heat, forcing the compressor to overwork and overheat, which trips the overload protector with a click. Cleaning them with a brush and vacuum is a simple, no-cost fix that should be done regularly. In fact, cleaning the condenser coils can resolve about 60% of clicking issues.
- Faulty Condenser Fan Motor
This fan cools the compressor and coils. If it’s blocked or fails, the compressor will overheat and click off. Check for obstructions and see if the blade spins freely. If it doesn’t run when the fridge has power, the motor may need replacement.
- Defrost System Failures
If you see heavy frost on the back wall of the freezer, the issue is likely the defrost system. This frost blocks airflow, preventing cooling. The clicking may come from a failed mechanical defrost timer. You will need to test the defrost timer, defrost heater, and defrost thermostat to find the broken part.
- Other Simple Checks
- Check the Thermostat: Ensure the temperature control hasn’t been accidentally turned down or off.
- Check for Airflow: Vents inside the freezer and refrigerator must be clear for cold air to circulate. Blocked vents can prevent the refrigerator section from getting cold.
- Evaporator Fan: If you can hear the compressor running but the fridge isn’t cooling, the evaporator fan inside the freezer might be the problem. A squealing or chirping noise that gets louder when you open the freezer door is a common sign of a failing evaporator fan.
Part 5: Cost Analysis: DIY vs. Professional Repair
Once you’ve diagnosed the problem, you can decide whether to repair it yourself or hire a professional. Many common repairs are manageable for a confident DIYer, saving you hundreds of dollars in service fees.
| Component | Average Part Cost (DIY) | Estimated DIY Repair Time | Professional Repair Cost (Parts & Labor) |
| Start Relay/Overload Protector | $15 – $50 | 15 – 30 minutes | $150 – $300 |
| Condenser Fan Motor | $20 – $150 | 30 – 90 minutes | $200 – $350 |
| Defrost Timer | $10 – $60 | 20 – 75 minutes | $100 – $400 |
| Defrost Thermostat | $10 – $50 | 1 – 2 hours | $100 – $250 |
- Professional Costs Explained: A technician visit typically includes a service call fee of $75 – $150, which is often waived if you proceed with the repair. Labor rates range from $50 to $150 per hour. For a simple start relay replacement, most of the cost is for the technician’s time and travel, not the part itself.
- Know Your Limits: While DIY can save money, know your limits. If a repair seems too complex or you are unsure, it is always best to call a qualified technician.
- Compressor Replacement: This is a major repair requiring a professional with specialized equipment to handle the sealed refrigerant system. The cost can range from $700 to $1,250. Given this high cost, it is often more economical to replace the entire refrigerator, especially if it is over eight years old.
Executive Summary
If your refrigerator is clicking and not cooling, don’t assume it’s a catastrophic failure. The issue is often a simple, inexpensive part.
- Debunk the Myth:The most common myth is that a clicking sound means a dead compressor. More often, the problem is a faulty start relay or overload protector.
- Pinpoint the Click’s Location:A click from the lower back combined with no cooling points to a compressor start-up failure.
- Analyze the “Hum-Then-Click” Cycle:A repeating hum followed by a click strongly suggests a problem with the start relay, overload protector, or the compressor itself. Loud banging or grinding noises point towards a more serious compressor failure.
- Perform Diagnostic Tests:
- Simple Fixes First:Unplug the fridge and clean the condenser coils. This simple step can solve up to 60% of clicking issues. Also check the thermostat setting and ensure air vents are not blocked.
- Test the Relay:Perform the “shake test” on the start relay. A rattle means it’s broken and needs replacement.
- Use a Multimeter:For a definitive diagnosis, test the start relay (should be 3-12 ohms), overload protector (should have continuity), and the compressor windings (resistance values must add up correctly). A compressor that is shorted to ground is a failed part.
- Make an Informed Decision:Use the cost analysis table to weigh a DIY repair against hiring a professional. A start relay is a cheap and easy DIY fix that can save you hundreds of dollars. If tests point to a failed compressor, the repair is very expensive, and you should consider replacing the appliance.
Strong Conclusion:
A clicking refrigerator that has stopped cooling is an urgent problem, but it is rarely a death sentence for the appliance. That persistent “hum-then-click” cycle is a clear distress signal, but more often than not, it points directly to a faulty start relay—a simple and inexpensive part. By methodically following the diagnostic steps outlined in this guide—from the no-cost fix of cleaning the condenser coils to testing components with a multimeter—you empower yourself to make an informed, cost-effective decision.
You can now confidently distinguish between a quick DIY repair that saves you hundreds and a major issue requiring professional help. Before you assume the worst and start shopping for a new refrigerator, take a moment to investigate. The solution is very often easier and cheaper than you think.